Do you love pumpkin seeds as much as I do? Whether you’re growing pumpkins in your garden or just picking some up from the store, drying and flavoring those seeds can turn them into a delicious snack! Join me as I share easy steps to transform your pumpkin seeds into a tasty treat that you can enjoy all year round!
Harvesting and Preparing Pumpkin Seeds for Drying
Harvesting pumpkin seeds is an exciting step, especially if you’ve grown your pumpkins in your very own garden! Not only do you get to enjoy the delicious pumpkin flesh, but you also unlock the potential of those fabulous seeds. I love knowing that I can use every part of the pumpkin!
Here’s how to get started:
- Choose Ripe Pumpkins: Look for pumpkins that are fully mature. They should be a deep, vibrant color! Pick ones with hard skin because that usually means the seeds inside are ready to go. You don’t want to get stuck with immature seeds, right?
- Cut Open the Pumpkin: Use a sharp knife and carefully slice around the stem. Make a circular cut, giving yourself enough space to scoop out the seeds and pulp together. Be careful — safety first!
- Scoop Out the Pulp: Now for the fun part! Use a large spoon or your hands (it’s totally okay to get a little messy) to scoop out the insides of the pumpkin. Place everything in a bowl or colander.
- Separate Seeds from Pulp: Here’s where you channel your inner archeologist. Gently pull the seeds away from the pulp. Try to clear off as much of that stringy pumpkin flesh as you can. The cleaner the seeds, the better they’ll dry!
Once you’ve harvested and separated those seeds, you’re ready to move on to cleaning them. A little preparation goes a long way, and trust me, your future snacking self will thank you!
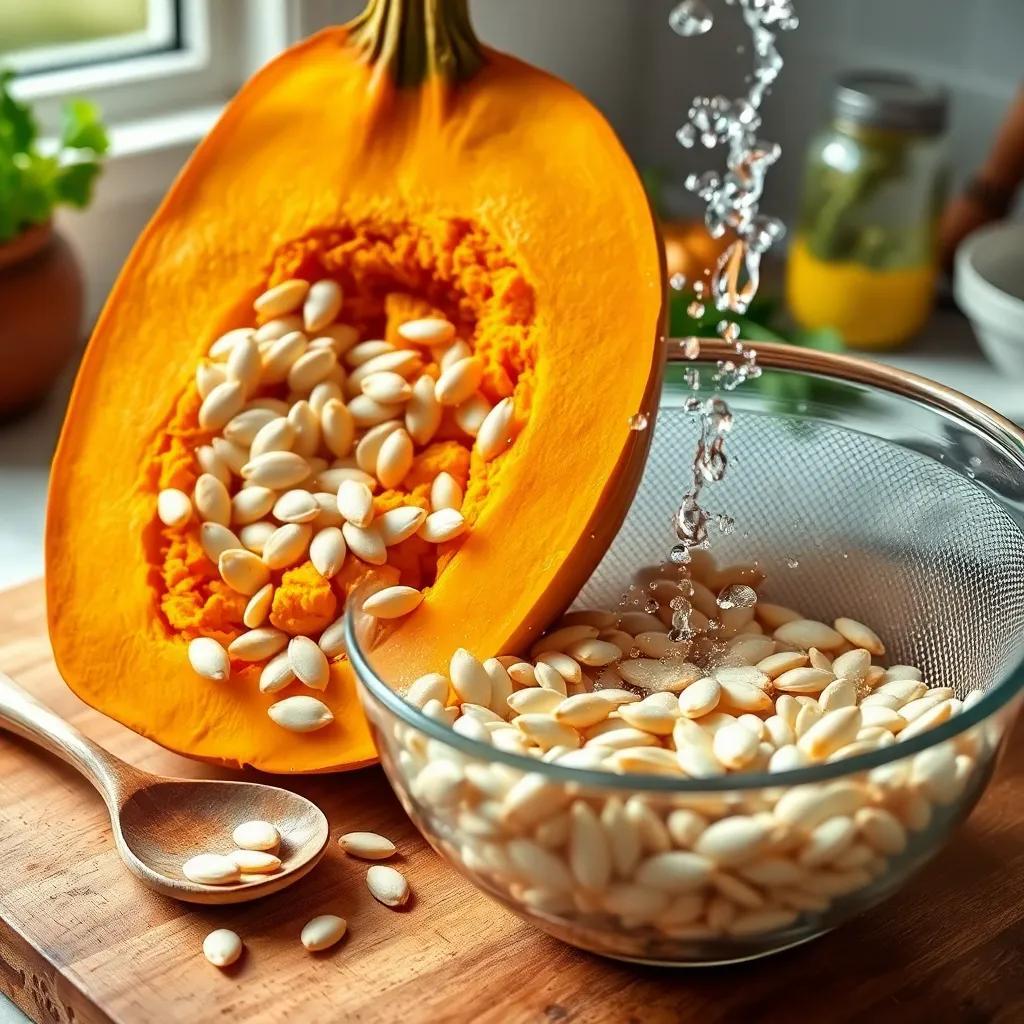
Cleaning Pumpkin Seeds for Optimal Drying
Cleaning your pumpkin seeds is super important before drying them. You want to make sure there’s no leftover pulp, because that can lead to mold later on. Yikes! Let’s get those seeds squeaky clean!
Here’s how I do it:
- Rinse the Seeds: Place your seeds in a colander or fine-mesh strainer and rinse them under cool running water. If you get a little impatient, wave your hands around gently to help dislodge any stubborn bits of pumpkin goo.
- Remove Floating Seeds: After rinsing, look closely for any seeds that are just floating there. They usually mean trouble — either they’re empty or not fully mature. Toss those out! Your seeds should be in it to win it!
- Soak the Seeds: For an extra clean, you can soak them in a bowl of water for 6-8 hours. This helps loosen any remaining debris. Plus, it’s like giving your seeds a spa day!
- Drain and Pat Dry: Once they’ve soaked, drain them and spread them out on a clean towel. Use another towel to gently pat them dry. Let them air dry for a few hours until they feel completely dry to the touch.
Now your seeds are clean and ready for the next step! Remember, cleaning is key to achieving that perfect snack flavor. Happy cleaning!
Best Methods for Drying Pumpkin Seeds
Now that you’ve harvested and cleaned your pumpkin seeds, it’s time to dry them! This step is super important because proper drying will help keep your seeds fresh and tasty. There are a couple of methods to choose from, and I’ve used both, so I’ll share my favorites!
Air Drying Method
The tried-and-true air drying method is simple and effective. Here’s how I do it:
- Spread Them Out: Lay the cleaned seeds in a single layer on a baking sheet or a mesh drying rack. Make sure they’re not touching because they need room to breathe!
- Find a Good Spot: Place the baking sheet in a well-ventilated area, away from direct sunlight. A kitchen counter works great!
- Wait Patiently: Let the seeds air dry for about 1-2 weeks. I know, it sounds like forever, but trust me — a little patience goes a long way!
Oven Drying Method
If you need those seeds dried in a hurry (hello, snack attack!), you can use the oven. Here’s what to do:
- Preheat Your Oven: Set it to a low temperature, around 150°F (66°C).
- Prepare the Seeds: Spread your seeds in a single layer on a baking sheet lined with parchment paper.
- Dry Them Out: Place the baking sheet in the oven and leave the door slightly ajar. This helps moisture escape! Let them dry for 2-3 hours, or until they’re crispy.
No matter which method you choose, just make sure the seeds are completely dry before moving on to storing them. You don’t want any moisture sneaking in!
Flavoring Pumpkin Seeds Before Drying
Now that your pumpkin seeds are dried and ready, why not add a delicious twist? Flavoring them before drying can give your snacks a unique taste that will wow your family and friends!
Here’s how I like to spice things up:
- Choose Your Seasonings: You can go sweet or savory! Some popular choices include:
– Salt (classic!)
– Garlic Powder (for a zesty kick)
– Paprika (for a smoky flavor)
– Cinnamon and Sugar (if you want a sweet treat)
- Mix It Up: In a bowl, toss your cleaned seeds with a little olive oil to help the seasonings stick. Then, sprinkle your favorite spices over them. Use enough seasoning so every seed gets some love!
- Coat Evenly: Gently stir until all the seeds are coated. This part is so satisfying; you’ll see them transform into little flavor bombs!
- Spread and Dry: Once seasoned, spread the seeds out on a baking sheet in a single layer, and follow the air drying or oven drying methods outlined earlier.
Flavoring your pumpkin seeds is an easy way to make them extra special! I mean, who doesn’t love a snack that’s both healthy and tasty?
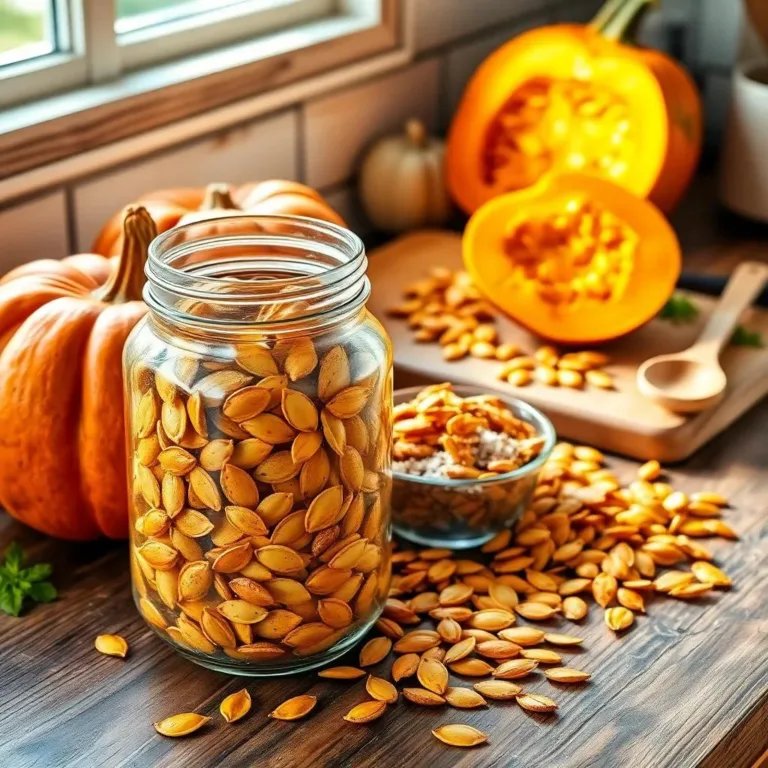
Storing Dried Pumpkin Seeds for Longevity
Congratulations! You’ve successfully dried and flavored your pumpkin seeds. Now let’s talk about how to store them so they remain fresh and delicious for months to come!
- Cool Down: First, let your dried seeds cool completely. You don’t want any heat trapping moisture in the container.
- Choose Your Container: I love using airtight containers for storage. Glass jars work great, or you can use resealable plastic bags. Just make sure they seal tightly!
- Add a Moisture Absorber: To keep those seeds crispy, consider adding a silica gel pack or a little piece of bread. This helps absorb any moisture, keeping your seeds in perfect condition.
- Label and Date: Don’t forget to label your container! Write the type of seeds and the date you dried them. This way, you’ll know how long they’ve been stored.
- Store Properly: Find a cool, dry place for your container, away from sunlight and heat. A pantry or cupboard works wonders!
When stored correctly, your dried pumpkin seeds can last for several months. Whenever you need a snack, just grab a handful! You can toast them, sprinkle them on salads, or enjoy them straight from the jar. Happy snacking!